That old phone in your drawer is probably doing two jobs right now: taking up space and holding onto data. Even if you think you “deleted everything,” smart tech often keeps backups, app data, and cloud sync tokens. In 2026, secure wiping matters as much as recycling, because e-waste isn’t just trash—it’s also a privacy risk.
This guide walks you through how to dispose, recycle, and wipe devices securely before selling or donating. I’ll share the exact order I use, what to double-check, and what most people get wrong when they switch phones, tablets, laptops, smart watches, or smart home gear.
Why “wipe and done” fails: the hidden data in modern smart tech
The main takeaway: a reset can clear what you see, but it may not remove what you forgot—especially on phones, laptops, and accounts synced to the cloud.
When people say “I factory reset it,” they usually mean they went to Settings and hit Reset. That action is good, but it’s not the whole story. Many devices still keep data in places you don’t think about, like encrypted partitions, downloaded files, paired accounts, SD cards, and cloud backups.
There’s also the “account lock” problem. After a proper reset, your device should stop belonging to your accounts. If you miss one sign-out step, the next owner may get blocked out, or worse—they may still be able to access old data tied to your account.
Quick definition: Secure wiping refers to a process that makes stored data unrecoverable, not just erased from the screen. On most modern devices, it also means making sure encryption keys are removed.
E‑Waste Meets Smart Tech: what to do before you wipe anything
The main takeaway: prep first, then wipe—because once you wipe, you can’t easily “undo” a missed item.
Here’s my order for 2026, and it works across most phones, tablets, and laptops.
Step 1: Back up the right things (and check they really restored)
Before wiping, confirm your backup is complete. For phones, I recommend doing a quick test restore to a spare device or at least checking recent photos and key apps in the cloud.
Common mistake: backing up, then moving on without checking. Two days later, you realize your 2FA codes didn’t come across, or your photo library didn’t sync.
Step 2: Remove SIM/eSIM info and anything tied to your number
For phones, take out the SIM (if you have one) and check whether you have an eSIM profile. eSIM is stored on the device, so deleting accounts without managing the carrier profile can still cause trouble.
If you’re switching carriers, do the carrier transfer first. If you’re donating, remove it entirely.
Step 3: Stop device pairing and smart home access
If your device connects to smart home systems, you should remove those links. For example, you don’t want your next tenant getting push access to your home cameras, door locks, or thermostat app.
Also remove Bluetooth pairing from speakers, cars, headphones, and watches. It’s a small step that prevents “why is it still trying to connect to me?” problems later.
Step 4: Make a “sign-out checklist” for accounts
This is where privacy usually breaks. Wiping the device won’t always log you out of every account in every place.
Use this mini-checklist:
- Sign out of Apple ID / Google account on the device
- Remove the device from your account’s “devices” page
- Sign out of the app stores (if the device prompts it)
- Remove payment methods (stored cards, mobile wallets, transit passes)
- Remove any 2FA backup codes linked to the device
If you want a deeper look at account and session safety, check out our post on basic account security and how persistent login tokens work.
How to wipe phones and tablets securely before selling or donating

The main takeaway: do a full reset, then verify account sign-out and cloud sync are gone.
For phones and tablets, “secure wiping” usually means two layers: (1) your device reset and (2) your account removal so the next person can’t see or use your data.
iPhone and iPad (2026 best practice)
Key takeaway: erase the device from Settings and also remove it from your Apple account.
- Go to Settings > General > Transfer or Reset iPhone.
- Choose Erase All Content and Settings.
- When prompted, enter your passcode and confirm.
- After it restarts, keep the device offline for a moment (just to avoid re-linking).
- On another device, sign in to your Apple ID and remove the device from your list of devices.
I like to follow up by turning off Find My before erasing if the menu shows that option. Find My is Apple’s anti-theft feature, and it also blocks the next owner if you leave it on.
What most people get wrong: they reset but forget to sign out of iCloud. If you leave iCloud active, you can end up with a “locked” device for the buyer or recipient.
Android phones and tablets (what to double-check)
Key takeaway: factory reset plus account removal plus external storage wipe is the right combo.
- Back up your data.
- Go to Settings > System > Reset options.
- Choose Erase all data (factory reset).
- If you have an SD card, remove it. Factory reset won’t always fully wipe what’s on the SD card.
- Sign out of your Google account and remove the device from your Google account “Manage your devices.”
If you used Samsung, Google, or another brand account on the device, remove those too. Some devices have multiple sign-in layers (main account, backup account, smart watch pairing account).
For security, also check whether your “Find My Device” or “device protection” is tied to your account. Keep it simple: remove it from the account first.
Laptops and desktops: secure wipe steps that match your device
The main takeaway: laptops need extra care because data often lives in downloads, cached files, and recovery partitions.
Here’s the practical truth: a factory reset on a laptop isn’t always the same as a secure wipe. In most cases, modern drives use encryption, which helps. But you still need correct steps so the next owner can’t recover data.
Windows laptops: reset, then verify encryption and account sign-out
Key takeaway: use the built-in “Reset this PC” flow and remove Microsoft account links.
- Back up important files.
- Go to Settings > System > Recovery.
- Select Reset this PC.
- Choose Remove everything.
- If you see options for drive cleaning, pick the stronger option.
- After reset completes, confirm the device is removed from your Microsoft account device list.
If BitLocker (or another drive encryption) is enabled, a reset can be a strong baseline because encryption keys are what make data unreadable. But you should still remove the account and payment info.
If you have a work laptop, check your company policy. Some businesses require IT-managed wipes with specific tools.
MacBooks: erase the drive the right way
Key takeaway: sign out of iCloud, turn off security locks, then erase.
- Sign out of iCloud (System Settings > your name > Sign Out).
- Also sign out of Apple services like iMessage/FaceTime if they show separate prompts.
- Restart into recovery mode.
- Use Disk Utility to erase the internal drive.
- Reinstall macOS if the setup screen requires it.
On Apple silicon machines, you’ll often use the built-in erase flow to remove Activation Lock protection. That’s what matters for the next owner.
When I’ve tested this in real transfers, the “forgot to sign out of iCloud” issue was the big problem—not the erase itself.
Chromebooks: Powerwash and account removal
Key takeaway: Powerwash is the main step, but you must remove the Google account link.
- Back up your files from Google Drive (if needed).
- Sign out of your Google account on the Chromebook.
- Go to Settings > Advanced > Reset settings.
- Choose Powerwash.
- Remove the device from your Google account’s device list.
What about smart watches, earbuds, and other “small” devices?
The main takeaway: small gadgets still hold personal data via health history, pairing keys, and synced accounts.
A lot of people forget that smart watches and fitness bands can store step history, health metrics, and sometimes offline playlists. Earbuds can also store pairings and sometimes have onboard settings.
Smart watches and fitness trackers
For Apple Watch, Samsung Galaxy Watch, Fitbit, and similar devices, do these two steps every time:
- Unpair it from your phone (Bluetooth settings or the watch app)
- Reset the watch from its settings menu
Then remove the watch from the account page in the companion app. I’m not exaggerating—this prevents the “previous owner still owns it in the app” problem.
Smart speakers and smart displays
If you’re donating an Alexa Echo or Google Nest display, factory reset it and remove it from your home account. Also remove any linked streaming services you used, like Spotify logins.
These devices often store configuration data in the cloud, so wiping the speaker alone isn’t enough if the account still lists your home and devices.
Gaming consoles and streaming boxes
Consoles and TV streaming boxes hold downloaded games, user profiles, and sometimes purchase info. Use the built-in “Factory reset” and then sign out of the account on the account portal.
If you sell a console, wipe memory cards or storage units too. People forget external drives.
Recycling and disposal: how to handle e-waste responsibly in 2026
The main takeaway: secure wiping and responsible recycling go together—because even “blank” devices become e-waste once they’re gone.
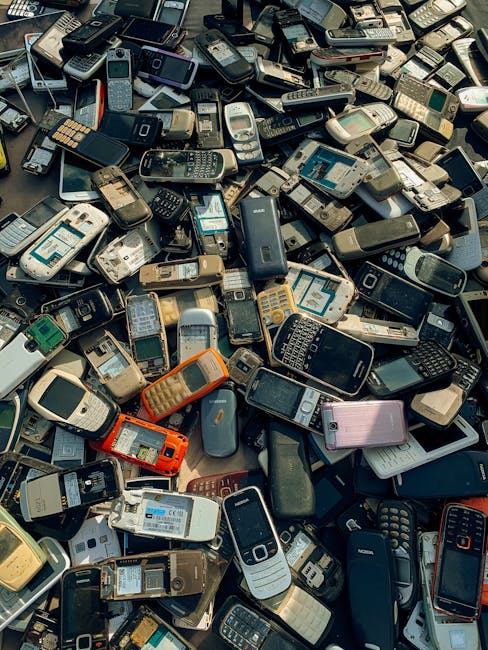
E-waste refers to discarded electronics, from phones to laptops to cables and chargers. It’s a mix of materials, including metals and plastics, and some parts contain regulated substances. In many places, tossing electronics in the trash is illegal or heavily discouraged.
Step-by-step: recycle the “right way” without breaking rules
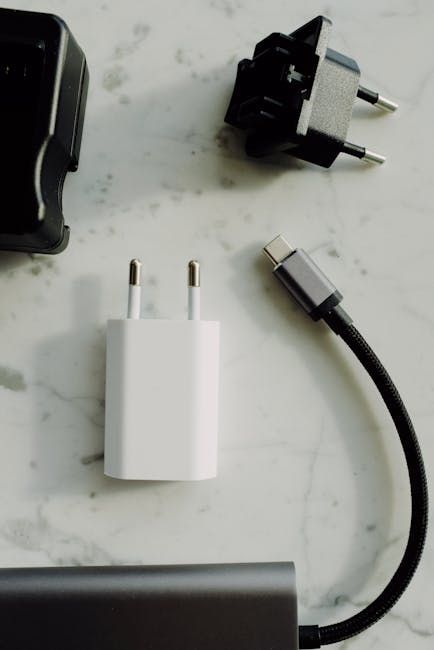
- Keep parts together: bundle cables, chargers, and accessories. They’re useful, and they help recyclers sort items.
- Remove personal items: any SIM cards, SD cards, and external storage should be removed and wiped separately.
- Choose the destination: manufacturer take-back programs, certified e-waste drop-off sites, or municipal recycling events.
- Track the item: if you’re dropping off, take a photo of the label or receipt.
Donation vs recycling: when each one makes sense
Donation is great when the device works and passes basic checks. Recycling is the better choice when the device is damaged, has severe battery swelling, or can’t power on.
I’ve learned to look for three “recycle immediately” signs:
- Battery swelling or puncture risk
- Liquid damage with corrosion
- Repeated boot loops or storage corruption that prevents updates
Smart tech special case: cameras, routers, and home hubs
Routers and home hubs can store logs and configuration profiles. Cameras often store clips on internal storage or via SD cards. Wipe the device and remove it from the app account before you donate.
In my own setup, I once skipped SD card removal and later realized the donor had kept the SD card—so the next person couldn’t view anything. That taught me to treat smart tech like a mini-computer, not just a gadget.
People Also Ask: quick answers to common security and recycling questions
How do I securely wipe a phone before donating?
Answer: back up, sign out of your account, then erase the device from the settings menu. After the wipe, remove the device from your account’s “devices” list so it can’t be re-linked.
Don’t forget the “extras”: SIM/eSIM, SD cards, and paired devices like watches or cars.
Will a factory reset delete my photos and messages for good?
Answer: a factory reset usually removes access to data, especially if the device uses full-disk encryption. But it’s not wise to assume it’s perfect without checking account sign-out and SD card handling.
If you stored data on a removable drive, reset or remove that storage too. For anything sensitive, treat removable storage as separate.
Should I remove my SD card before recycling?
Answer: yes. SD cards can hold the photos, downloads, and backups that you thought were on the device. Remove it and either wipe it or destroy it if you don’t trust your ability to wipe it fully.
What’s the safest way to wipe an old laptop?
Answer: use the built-in “reset/erase” option that removes everything, then sign out of the account from the vendor side (Microsoft or Apple). For best results, follow the official recovery/erase steps for your exact model.
If you have a work or school-managed device, use the organization’s wipe method to avoid policy violations.
Where should I take e-waste for recycling?
Answer: use a certified e-waste drop-off location, manufacturer take-back program, or local municipal program. If you’re not sure, search for “e-waste recycling near me” plus your city name and look for official or certified sites.
Comparison: best options for selling, donating, and recycling smart tech
The main takeaway: pick the method that matches device health and your time, but don’t skip secure wiping either way.
| Option | When it fits | Biggest risk if you skip steps | My quick checklist |
|---|---|---|---|
| Sell to a buyer | Device works, battery is okay | Account lock or data access | Sign out, erase, remove from devices list |
| Donate | Device works and is safe | Health/privacy exposure via synced accounts | Unpair apps/devices, remove payments |
| Recycle | Damaged, won’t power, unsafe battery | Leaving personal storage behind | Remove SD/SIM, verify erase, drop off responsibly |
My personal “one hour before you list it” routine (what I do every time)
The main takeaway: a short routine prevents most security mistakes.
When I list a device for sale or pack it for donation, I use a timed checklist. It takes about an hour for a phone or tablet, and 1.5–2 hours for a laptop.
The routine
- Clean up and stop sync: turn off any cloud sync you don’t need and confirm your data backup.
- Sign out: remove the device from Apple ID / Google account device lists.
- Erase: do the factory reset or erase flow from the device settings.
- Remove external storage: SD cards, USB drives, SIM cards.
- Final check: power it on to make sure it shows a setup screen, not “continue as previous owner.”
If the device doesn’t show a fresh setup screen, I don’t ship it. I fix the missing sign-out first.
Common mistakes that lead to privacy leaks (and how to avoid them)
The main takeaway: most leaks happen because of accounts and storage you forgot, not because wiping “didn’t work.”
- Leaving your account logged in: wipes remove data, but accounts can still be active.
- Ignoring SD cards and external drives: photos and documents live there too.
- Forgetting payment and wallet apps: transit passes and stored cards can remain tied to your account.
- Skipping unpairing: smart watches, cars, and speakers may still be connected.
- Donating a device with a broken screen lock: donations should include a working reset, not a device that forces you to guess passcodes.
If you’re also thinking about what happens to your data after disposal, you may like our related guide on how data breaches happen through old devices. It explains why “out of sight” doesn’t always mean “out of risk.”
When secure wiping isn’t enough: hard drives, special cases, and limitations
The main takeaway: for a few device types, you need extra steps or the right tool.
Most modern laptops use encryption, so a proper erase is very strong. Still, if you’re dealing with older machines using unencrypted drives, you should follow manufacturer instructions for drive cleaning, or use a reputable wipe process designed for that hardware.
Also, if your device is physically damaged, trying to wipe it may be risky. In those cases, remove safe parts when possible and recycle through a certified e-waste channel.
I won’t pretend every situation is the same. If you’re not comfortable opening anything, don’t. Your safety matters more than “perfect” wiping.
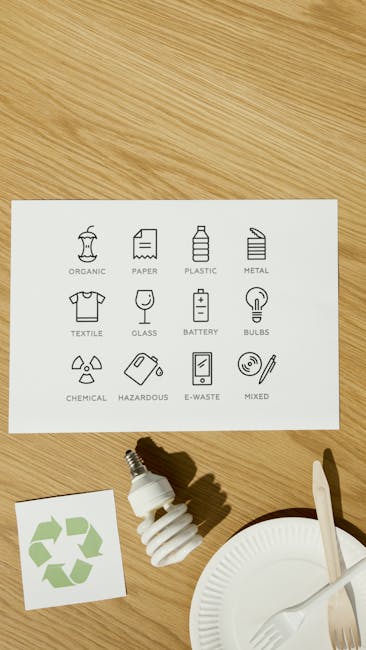
Featured image alt text suggestion
Tip: Use a descriptive alt text that includes the keyword naturally.
Alt text idea: “E‑Waste Meets Smart Tech guide showing secure device wiping and recycling before sale or donation.”
Conclusion: wipe smart tech correctly, then recycle it like it matters
The best time to protect your privacy is before you hit “sell” or “drop off.” If you wipe smart tech securely and remove your accounts from every place they can stick, you stop being the last owner who keeps the risk.
Actionable takeaway: follow one routine—backup, sign out, erase, remove SD/SIM, and confirm a setup screen—then choose donation or certified e-waste recycling based on device health. That’s how you handle e-waste and smart tech with both safety and care.
If you’re ready for the next step, pair this with our how-to guides on device security and account safety so your new gadgets start clean, too.