If you’ve ever tried to “just make a quick IoT demo” and then spent hours debugging Wi‑Fi power issues, you’ll feel this difference right away: ESP32 is usually faster to a working Internet connection, while Raspberry Pi Pico is often faster to a clean sensor/automation prototype.
In 2026, both boards are popular because they’re cheap and well supported. The real question is what you’re prototyping: a smart sensor that sends data over Wi‑Fi, or a local controller that talks to other devices and stays simple.
Below I’ll compare ESP32 vs Raspberry Pi Pico in a way that actually helps you pick the right board for your next IoT build—plus I’ll cover common mistakes that slow people down.
ESP32 vs Raspberry Pi Pico for IoT: quick winner by project type
ESP32 wins when your IoT prototype needs Wi‑Fi right away. Pico wins when you want a low-cost, predictable microcontroller for sensor reading, motor control, and “mostly local” logic.
Here’s the straight answer I give friends when they ask me which one to buy:
- Choose ESP32 if you need Wi‑Fi, MQTT, HTTPS, BLE (Bluetooth Low Energy), or a full “connect to the cloud” demo.
- Choose Pico if your project is mostly about reading sensors, controlling relays/LEDs/servos, or talking over I2C/SPI/UART to something else.
Both can do either job, but the path is different—and the path matters when you’re building under time pressure.
What each board is (and what that means in real life)
ESP32 is built for connected IoT. It’s a microcontroller with Wi‑Fi and often Bluetooth support built in, so you don’t need extra chips just to get online.
Raspberry Pi Pico is built for simple control. It’s a microcontroller board designed around the RP2040 chip, and it’s great at real-time I/O: reading sensors, generating PWM, and running small control loops.
ESP32 basics: Wi‑Fi and BLE in one package
The ESP32 family refers to several chips and dev boards. Most popular versions include Wi‑Fi, and many include BLE too. That means you can do things like send temperature readings via MQTT, or pair a phone to update settings.
In my lab, this saves time because I don’t have to decide on a separate Wi‑Fi module, manage extra wiring, or fight different power needs from two separate boards.
Raspberry Pi Pico basics: strong I/O and clean prototyping
The RP2040 chip on the Pico is known for good I/O handling and a simple learning path. If your prototype is like: “Read a sensor, filter the data a bit, then turn on a relay,” Pico is a very comfortable fit.
Also, Pico is a common pick for teaching basics. You’ll find lots of example code that’s easy to modify without pulling in a ton of networking libraries.
Performance for IoT prototypes: what you feel while building
Your experience is usually about speed to first working build, not raw benchmark numbers. Still, the hardware differences show up in common tasks like networking, timing, and how stable your code runs.
ESP32 performance: networking-first, multitasking-friendly
When I build an IoT dashboard demo, the part that takes time is often networking, not sensor reads. ESP32’s built-in Wi‑Fi makes it easier to run MQTT clients, handle reconnections, and keep doing other work while it maintains a connection.
In a typical setup, you’ll log data from a sensor every 5–10 seconds and publish to an MQTT topic. ESP32 handles that well on battery or USB power as long as you don’t starve it with a weak power source.
Pico performance: great for sensor loops, less “internet-ready” out of the box
Pico is fast at reading sensors and controlling outputs. But it doesn’t usually have Wi‑Fi built in, so you add a separate module if you need Internet.
That extra module can be fine, but it changes the project from “one board with one job” into “two chips that must agree on protocols, wiring, and power.” For prototypes, that extra complexity is exactly what costs you time.
What most people get wrong
- They assume power is “just power.” ESP32 boards can pull more current during Wi‑Fi transmit bursts. If your USB supply or breadboard wiring is weak, the board resets and you’ll think your code is broken.
- They underestimate reconnect logic. Real Wi‑Fi is messy. On ESP32 you still need to handle reconnects. On Pico + Wi‑Fi add-ons, it’s the same story—just more work.
- They forget about sensor timing. If you read a sensor and also block while you wait for a network response, your control loop can lag. This is true for both boards.
Programming experience: ESP32 toolchains vs Pico workflows
Programming comfort is a big factor when you’re prototyping. In 2026, both boards are friendly, but they shine with different stacks.
ESP32: choose your path—Arduino, ESP-IDF, or MicroPython
ESP32 is widely supported. You’ll find:
- Arduino IDE for quick sketches and libraries like WiFi + MQTT.
- ESP-IDF for lower-level control and better performance tuning.
- MicroPython when you want fast iteration and simple scripts.
If you’re building an IoT prototype this week and you want it working, Arduino or MicroPython is usually the fastest path.
Pico: Arduino-Pico and MicroPython are popular
Raspberry Pi Pico is also supported with Arduino-style workflows and MicroPython. A lot of beginners start with MicroPython because it feels like writing small scripts.
If you’re doing real-time control—like reading sensors every 1 ms and driving outputs—Pico can feel very direct.
Original angle: I pick Pico when the “networking” isn’t the goal
Here’s my personal rule that keeps me from wasting time: if the feature you’re proud of is the control logic (filters, timing, alarms, state machines), I start with Pico. If the feature you’re proud of is “it talks to the cloud reliably,” I start with ESP32.
That small choice affects everything: how much time you spend debugging, how many libraries you import, and how often you fight with networking quirks.
Networking and IoT stacks: Wi‑Fi, MQTT, HTTP, and OTA updates
ESP32 wins for connected IoT stacks because Wi‑Fi is usually built in. Pico can do it too, but you’re more likely to add a network module or use a separate companion board.
MQTT and sensor telemetry
MQTT is a common choice for IoT because it’s simple and works well with dashboards. On ESP32, it’s straightforward to connect to Wi‑Fi, subscribe/publish topics, and send sensor data every few seconds.
On Pico, MQTT still works if you add networking hardware and a compatible networking stack. But that’s extra setup.
HTTP/REST and dashboards
If your prototype uploads data to an HTTP endpoint, ESP32 is usually the path of least resistance. You can use libraries that handle TLS/HTTPS more smoothly than many “add-on” setups.
On Pico, you’ll either need a networking adapter with a good library or you’ll write more plumbing code.
OTA updates (firmware updates over the air)
OTA matters when you deploy devices and don’t want to plug in cables. ESP32 supports OTA patterns widely, especially in Arduino/ESP-IDF projects.
Pico can support OTA via add-on networking, but it’s not as “default easy” in most hobby setups. If your project requires OTA from day one, ESP32 is the safer bet.
Security for IoT prototypes: what to do on day one
Security is not optional anymore. In 2026, even “just a hobby sensor” is often reachable from the internet because people mess up router settings.
Here’s what I do on both platforms, but I’ll point out where ESP32 usually makes it easier.
1) Don’t ship default Wi‑Fi names and passwords
Use a unique SSID and a real password. Even for prototypes, change it before you test outside your home.
If you’re doing Wi‑Fi provisioning, store credentials securely. ESP32 setups often include simple key-value storage, but you still need to treat credentials like real secrets.
2) Prefer MQTT with authentication
If you use MQTT, enable username/password or client certificates on your broker. Then verify your client ID handling so devices don’t silently overwrite each other.
One common mistake I’ve seen: people publish to a topic without any auth and assume “it’s only local.” That stops being true the moment you open ports or use a tunneling tool.
3) Use TLS when you can
TLS is Transport Layer Security, meaning encrypted connections between device and server. It prevents easy sniffing and many “man-in-the-middle” setups.
ESP32 generally has better support for TLS libraries in common IoT stacks. Pico can do it with the right networking add-on and libraries, but it can be harder to get right quickly.
4) Add rate limits and safe error handling
Even small devices can be abused. If your firmware has a “retry forever” loop, a bad network can turn into a battery-killing spam loop.
Set a retry backoff (example: 1s, 5s, 30s, then slow down). Keep logs minimal so you don’t leak info.
Which board is easier for secure IoT prototyping?
ESP32 is usually easier because the ecosystem already supports TLS, secure MQTT patterns, and common OTA workflows. Pico isn’t “unsafe,” but you’ll spend more time integrating the network piece.
If you care about security outcomes (not just “it connects”), start with ESP32 and good defaults.
Hardware expansion: sensors, displays, motor drivers, and radios
Pico shines for I/O expansion. ESP32 also has great I/O, but Pico tends to feel more “plug sensor → code it → plug actuator” with fewer moving parts.
I2C, SPI, UART: what you should plan for
Both boards support I2C and SPI for sensors like temperature, pressure, and IMUs. UART is handy for GPS, barcode scanners, and some Wi‑Fi modules.
My practical advice: before you buy any sensors, write down what buses you need. Then check that your chosen firmware libraries don’t conflict over pins.
Real-world example: building a door sensor
Scenario: a door opens, you want a local alarm and a push message to a home dashboard.
- Pico-first approach: reed switch + buzzer/LED. Then add a separate Wi‑Fi module only if you truly need the dashboard.
- ESP32-first approach: reed switch + buzzer/LED + Wi‑Fi + MQTT. You get the full “door to phone” demo without extra hardware.
Time-wise, ESP32 often wins because you avoid choosing and integrating a second communications module.
Another example: a garage light controller
Scenario: detect motion, turn on lights for 2 minutes, then turn off. Optional: log events to a server.
I’d start with Pico because the control logic is the heart of the prototype. If you later decide you want cloud logging, you add networking when you’ve proven the local behavior.
Power and reliability: the boring stuff that decides your success

Power stability is where many IoT prototypes fail. Both boards can be powered from USB, but battery builds are different.
ESP32 power gotchas
ESP32 Wi‑Fi transmit can cause brief current spikes. If your power source can’t handle spikes, you’ll see random resets or corrupted serial output.
Action steps:
- Use a solid 5V USB supply or a battery regulator that supports current spikes.
- Keep wiring short on breadboards.
- Add a capacitor near the board (your exact value depends on your setup, but it’s a common fix for noisy power).
If you’re building a battery device, measure current with a multimeter in series or use a USB power meter.
Pico power expectations
Pico is often easier to keep stable in basic builds, especially for sensor reading and output control. If you add a Wi‑Fi module, then the same spike issues can show up again—just shifted to the add-on hardware.
Still, many Pico prototypes run reliably on cheap power setups because the base board isn’t doing constant radio work.
Comparison table: ESP32 vs Raspberry Pi Pico for IoT prototyping
Use this as a selection guide. It’s not about “which is better overall.” It’s about which one matches your build goals.
| Category | ESP32 | Raspberry Pi Pico |
|---|---|---|
| Wi‑Fi for IoT | Usually built in (faster cloud demos) | Needs add-on module for Wi‑Fi |
| BLE | Often supported depending on board | Not built in (unless using add-ons) |
| MQTT/HTTP | Common libraries and examples | Works with networking add-ons, more setup |
| Real-time I/O | Good, but network tasks compete | Excellent for sensor/control loops |
| OTA updates | Easier in common stacks | Possible, but more integration work |
| Power stability | Needs attention during Wi‑Fi spikes | Often simpler unless using Wi‑Fi add-ons |
| Learning curve | Easy for beginners with Arduino; deeper with ESP‑IDF | Easy for basics with MicroPython/Arduino |
Step-by-step: pick a board and build a working IoT prototype this weekend
Here’s a practical plan that keeps you out of trouble. It assumes you want a simple “sensor to dashboard” demo, which is what most people mean by IoT prototyping.
Step 1: decide what you must prove
- If you must prove online publishing, start with ESP32.
- If you must prove control timing and sensor logic, start with Pico.
Step 2: choose your sensor and sampling rate
Pick one sensor first. For example, read temperature every 5–10 seconds. Don’t start with five sensors and a motor before your data pipeline works.
Step 3: pick a messaging method
For quick demos, MQTT is usually easiest. You can also use HTTP POST to a test endpoint, but MQTT tends to be more “IoT-friendly” for dashboards.
Step 4: test offline before you connect
On both boards, print readings over serial first. Confirm your sensor readings are stable for 2–5 minutes. This catches wiring and sensor mistakes before you add Wi‑Fi problems.
Step 5: connect and add reconnection
Once Wi‑Fi is on, handle disconnects. The device should keep trying, but not in a way that freezes your control loop.
People Also Ask: ESP32 vs Raspberry Pi Pico
Is ESP32 better than Raspberry Pi Pico for IoT?
Yes, for connected IoT. If your prototype needs Wi‑Fi, MQTT, dashboards, or OTA updates, ESP32 is usually the faster and more reliable choice because it’s designed for networking from the start.
If your project is mostly local control with sensors and outputs, Pico can be the better starting point.
Can Raspberry Pi Pico connect to Wi‑Fi?
It can, but you usually need an extra Wi‑Fi module or a Pico variant/add-on that provides networking. That extra hardware changes the setup, power use, and code complexity.
So it’s doable, but if you want the simplest path to an online IoT demo, ESP32 still wins in most cases.
Which is easier for beginners, ESP32 or Pico?
Pico is often easier for beginners who only want sensors and simple control. ESP32 is easier for beginners who want the device to connect to the internet quickly.
In other words: beginners often pick the board that matches what they’re trying to build, and that makes the learning feel smooth.
Is Pico faster than ESP32?
“Faster” depends on what you measure. Pico can feel faster for tight sensor loops and direct control tasks. ESP32 can be faster to a working product when your task includes networking, because it has the Wi‑Fi piece built in and ready.
Which board is better for security in IoT projects?
ESP32 is usually the better starting point for secure IoT. Its ecosystem supports TLS and common secure IoT patterns more easily. Pico can be secure too, but networking integration tends to cost time and adds more places to make mistakes.
My recommendation for 2026: buy both, but decide first
If you only buy one board, pick based on what you want to prove. For most IoT prototypes that means ESP32 because it gets online faster with less extra hardware.
If your prototype is a “smart controller” (local logic, alarms, automation) and the internet is optional, Pico is a great choice.
If you can swing it, buying both is the best long-term move. I’ve built separate demo kits: ESP32 for cloud-ready sensors, Pico for quick control boards and lab instruments. You end up learning faster and wasting less time.
Where to go next on this site
If you’re building connected gadgets, you’ll probably want security checks too. These posts pair well with the ESP32 vs Raspberry Pi Pico decision:
- IoT device hardening checklist (what I check before deployment)
- How to secure an MQTT broker for home and small labs
- Wireless sensor battery life review: what kills runtime
Conclusion: the “winner” is the one that matches your IoT goal
For ESP32 vs Raspberry Pi Pico, there isn’t a single winner for every project. ESP32 wins when your prototype needs Wi‑Fi, MQTT, OTA updates, or a cloud dashboard quickly. Pico wins when your prototype is mostly about sensor/control logic and you want a clean, local, real-time build.
Actionable takeaway: write your project goal in one sentence—“send data to a server” or “control a system locally.” Then buy the board that matches that sentence. That one decision will save you more time than any library choice.
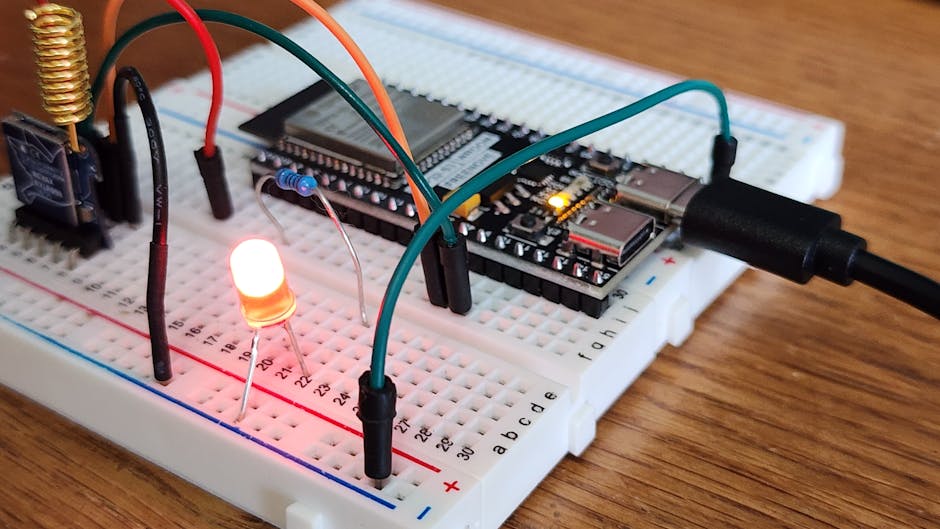
Featured image alt text: “ESP32 vs Raspberry Pi Pico IoT prototyping comparison showing boards and wiring setup for Wi‑Fi sensor projects”